How to seal a wooden cutting board? 8 easy steps
Sealing a wooden cutting board is essential for preserving its quality and longevity. Whether you’re a seasoned chef or a home cook, knowing how to seal a wooden cutting board can enhance its durability and resistance to moisture and bacteria. From choosing the right sealant to applying it correctly, Chef Studio will walk you through the steps to ensure your cutting board remains in top condition for years.
What does it mean to season or seal a wooden cutting board?
Sealing or seasoning wooden cutting board a wooden cutting board involves treating the surface of the board with a protective layer to enhance its durability, moisture resistance, and longevity. This process typically involves applying a food-safe oil or wax to the surface of the board, allowing it to penetrate the wood fibers and create a barrier against moisture and bacteria.
Seasoning or sealing helps prevent the wood from drying out, warping, or cracking over time and also enhances the appearance of the board. It is an essential step in maintaining wooden cutting boards and ensuring they remain safe and functional for food preparation. Continue reading to learn how to seal a wooden cutting board properly!


Read more: Top 10+ best Teak cutting boards for sale
Should you oil a wooden cutting board?
Are you supposed to oil a wooden cutting board? Yes, it is recommended to oil a wooden cutting board regularly to maintain its quality and prolong its lifespan. Oiling helps to replenish the natural oils in the wood, preventing it from drying out, cracking, or warping over time.
Additionally, wood cutting board oil treatment creates a protective barrier on the surface of the cutting board, making it more resistant to moisture, stains, and bacteria. Regular oiling also helps to enhance the appearance of the wood, keeping it looking fresh and vibrant. Therefore, it is advisable to oil your wooden cutting board periodically to keep it in optimal condition for food preparation.

When do you need to seal a wooden cutting board?
You need to seal a wooden cutting board when it starts to appear dry or dull, or if you notice any signs of wear and tear such as cracks or rough patches on the surface. Sealing helps to replenish the natural oils in the wood, preventing it from drying out and becoming susceptible to damage.
Moreover, sealing creates a protective barrier on the surface of the cutting board, making it more resistant to moisture, stains, and bacteria. It’s also a good idea to learn how to season a new wood-cutting board before using it for the first time to ensure its durability and longevity.
Overall, season wooden chopping board should be done as needed to maintain the quality and integrity of the product.

8 easy steps to seal or season wooden cutting board
Sealing or seasoning a wooden cutting board is essential to maintain its durability and hygiene. Let’s find out how to seal wood-burned cutting boards and how to seal cutting boards after wood burning with these simple steps:
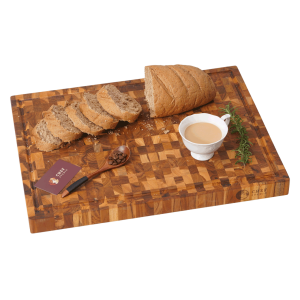
Season and seal wooden cutting board
1. Clean the cutting board
Before sealing or seasoning, make sure the cutting board is clean. Wash it thoroughly with warm, soapy water and let it dry completely.

2. Choose the oil
Select a food-grade oil suitable for sealing wooden cutting boards. Mineral oil and coconut oil are popular choices because they are odorless and won’t turn rancid over time.
3. Apply the oil
Pour a small amount of oil onto the cutting board’s surface. Use a clean cloth or paper towel to spread the oil evenly over the entire surface of the board, including the sides and edges. Ensure that the board absorbs the oil evenly.
4. Let it sit
Allow the oil to penetrate the wood for about 15-20 minutes. This allows the wood to absorb the oil and helps to replenish its natural moisture.
5. Wipe off excess oil
After the oil has had time to penetrate the wood, use a clean, dry cloth to wipe off any excess oil from the surface of the cutting board. This helps prevent the board from feeling sticky or greasy.

6. Repeat if necessary
Depending on the condition of the cutting board, you may need to repeat the oiling process 2-3 times to ensure thorough coverage and optimal protection.
7. Let it cure
Allow the cutting board to sit for several hours or overnight to allow the oil to fully cure and absorb into the wood.
8. Buff the surface
Once the oil has fully cured, use a clean cloth to buff the surface of the cutting board to remove any remaining residue and restore its natural luster.
By following these best ways to season a wooden cutting board, you can effectively keep it in top condition for the longest time. Remember to periodically reapply oil to maintain the board’s protective barrier and keep it looking its best.
Explore: Top 10+ best Acacia cutting boards for sale
How to seal a wood-burned cutting board?
To seal a wood-burned cutting board and protect the design, follow these steps:
1. Clean the surface
Ensure the cutting board is clean and free from any dust or debris. Use a damp cloth to wipe the surface gently and let it dry completely.
2. Choose a sealant
Select a food-safe sealant suitable for wooden cutting boards. Mineral oil or a food-grade polyurethane sealant are good options. Make sure the sealant is odorless and safe for food contact.
3. Apply the sealant
Using a clean brush or cloth, apply a thin layer of the chosen sealant over the entire surface of the cutting board, including the wood-burned design. Make sure to cover the design evenly without pooling the sealant.
4. Let it dry
Allow the sealant to dry completely according to the manufacturer’s instructions. This typically takes several hours to overnight, depending on the type of sealant used.

5. Sand if necessary
If the sealant creates any rough spots or bumps on the surface, lightly sand the cutting board with fine-grit sandpaper once the sealant is completely dry. Be careful not to sand away the wood-burned design.
6. Apply additional coats
Depending on the type of sealant used, you may need to apply multiple coats for optimal protection. Follow the manufacturer’s instructions for applying additional coats, allowing each coat to dry fully before applying the next.

7. Cure the sealant
Once all coats of sealant are applied, allow the cutting board to cure for at least 24 hours in a well-ventilated area. This allows the sealant to fully harden and provide maximum protection.
8. Polish the surface
After the sealant has cured, use a clean cloth to polish the surface of the cutting board gently. This helps remove any excess sealant and restores the natural shine of the wood.
Hopefully after following these steps, you can effectively seal a wood-burned cutting board and preserve the intricate design. Remember to periodically reapply sealant as needed to maintain the board’s protection and beauty.
In conclusion, how to seal a wooden cutting board is a simple yet essential process that helps protect the board from moisture, stains, and bacteria, thereby prolonging its lifespan. With proper care and maintenance, your cutting board will continue to be a reliable and indispensable tool in your kitchen arsenal.